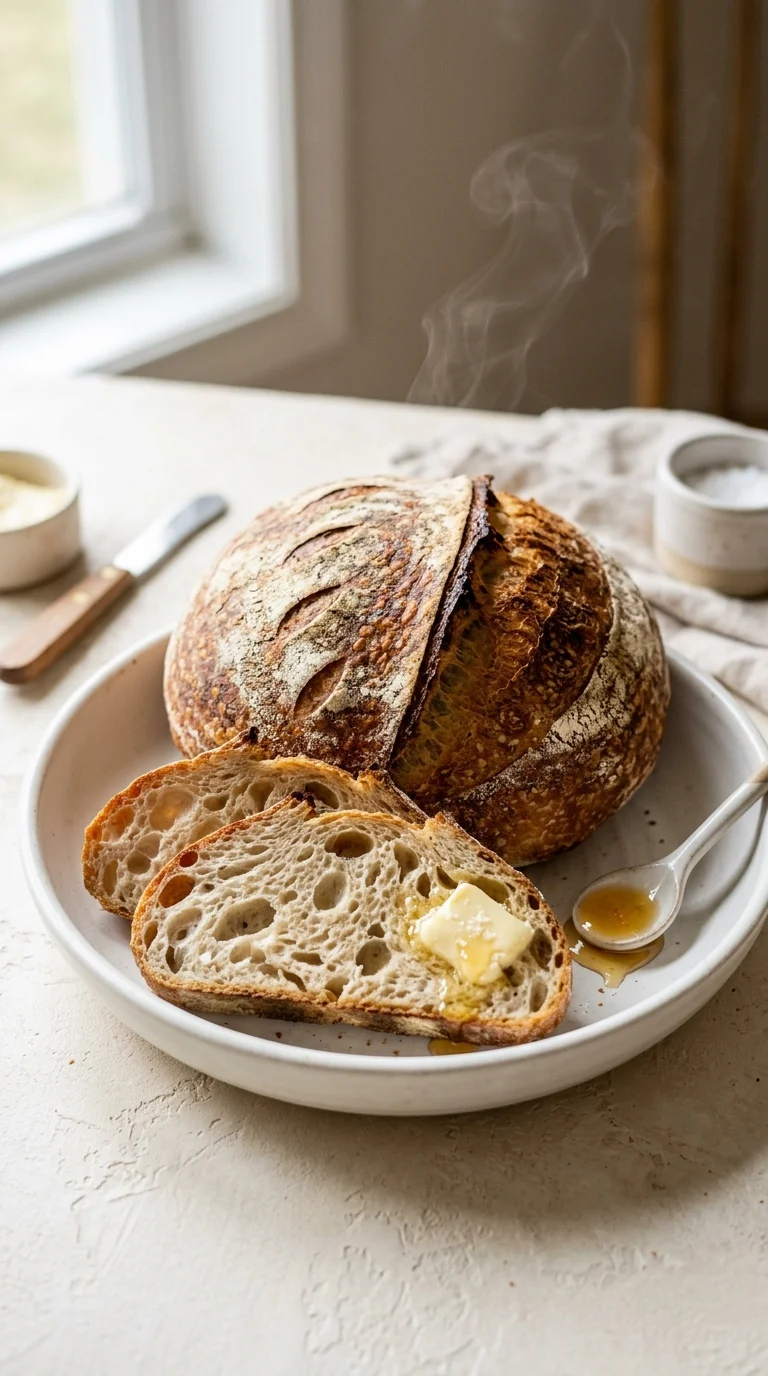
Sourdough is perhaps one of the oldest forms of leavened bread, dating back thousands of years to ancient Egypt. Unlike modern loaves that rely on commercial yeast, this tradition relies on a symbiotic culture of wild yeast and bacteria captured from the very air and the grain itself. It was once the primary way families kept their kitchens running, passing starters down through generations like heirloom jewelry.
Across Europe, different regions developed their own signature rhythms for this beginner-friendly homemade sourdough bread, often tailoring the hydration to the local wheat. The process of long fermentation wasn't just for flavor; it was a necessity that made the bread more digestible and preserved it longer in an era before refrigeration.
Culturally, the sourdough loaf represents a connection to the earth and the slow passage of time. The use of a heavy pot—much like the modern Dutch oven—mimics the ancient stone ovens that trapped steam to create that characteristic shatter-crisp crust and airy interior. It is a culinary legacy of patience and resourcefulness.
Why You'll Love It
-
- Honestly, there is just nothing like the smell of a fresh loaf filling the house; it feels like a warm hug for your soul.
-
- I love how it takes a few simple things—just 500 g bread flour and some water—and turns them into something so artisan and special.
-
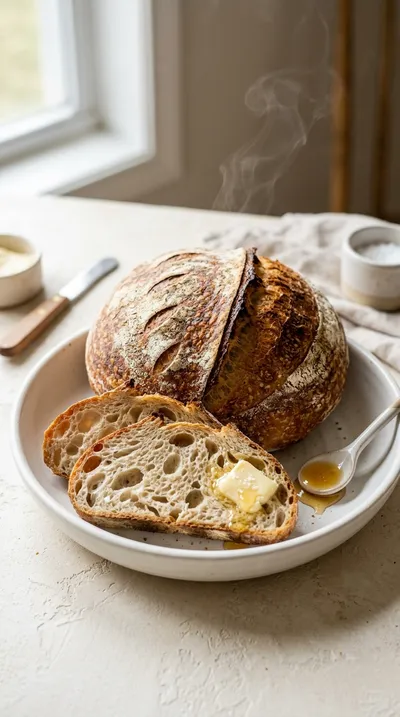
- Well, look, you don't need to be a pro baker here because the Dutch oven does all the heavy lifting for that gorgeous, golden crust.
-
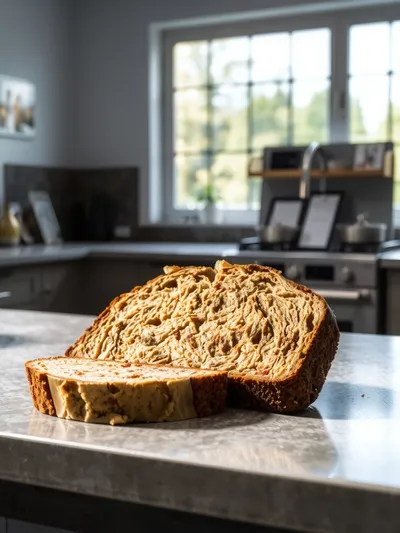
- It has this lovely, chewy interior that just makes you want to slow down and enjoy a quiet morning with a slice.
"I finally stopped buying the expensive loaves at the store. This recipe is so gentle and the crust is just... wow!"
Essential Ingredient Guide
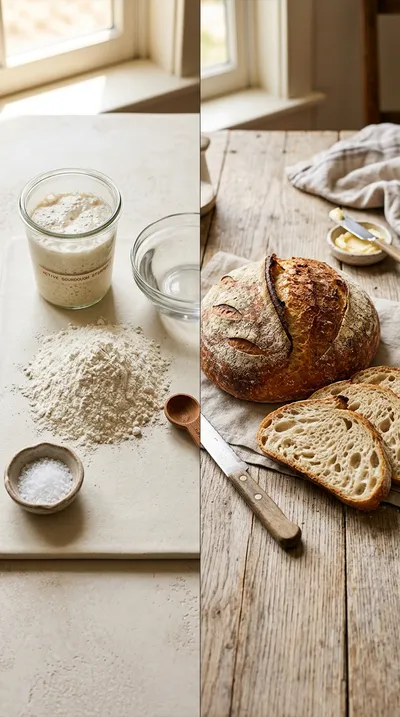
- 500 g bread flour (≈4 cups): I always use bread flour for this one. It's got that extra strength to give the loaf its lift, so it doesn't end up too flat, you know?
- 350 g water (≈1 ½ cups + 2 Tbsp water, 70% hydration): Warm water is key here. It helps the starter wake up and feel cozy, making the whole dough much more manageable and soft.
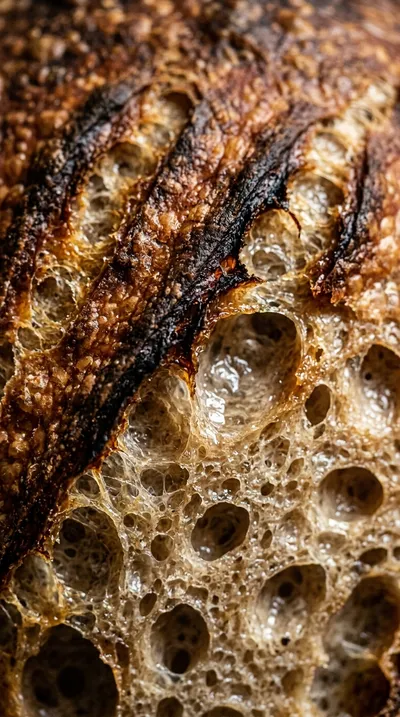
- 100 g active sourdough starter (≈⅓ cup, 20% of flour): This is the heart of your bread. Make sure it's bubbly and happy; that's what gives us those lovely little air pockets in the crumb.
- 10 g salt (≈1.5 tsp): Don't skip this, or the bread will taste a bit bland. I sprinkle it in gently to make sure every bite has that savory balance.
- A dusting of flour: Just a bit extra for your surface and banneton. It keeps the dough from sticking, which, believe me, saves a lot of frustration.
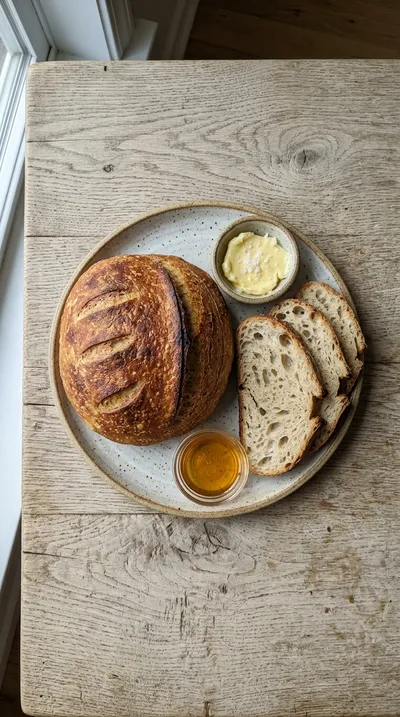
- Butter or honey: While not in the dough, a little pat of butter on a warm slice is just heaven. It melts right into the holes of the sourdough.
 Desserts & Baking
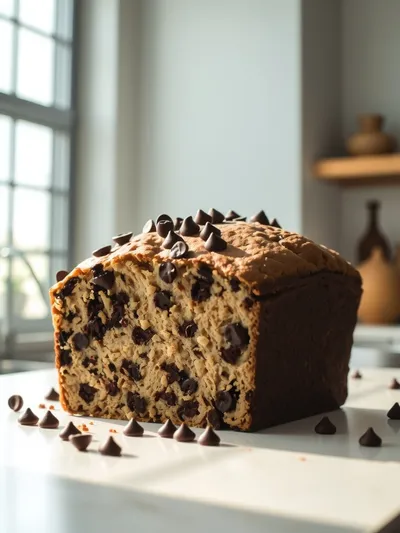
Chocolate Chip Banana Bread – Easy Recipe
Soft, sweet banana bread with chocolate chips that comes together in one bowl.
Complete Cooking Process
-
Ingredient Readiness:
Start by getting your 100 g active sourdough starter nice and bubbly. I like to make sure my water is just the right temperature so the yeast feels right at home.
-
Flavor Development:
The magic really happens during that 3-hour bulk ferment. That's when the wild yeast works its charm, creating those deep, tangy flavors we all love.
-
Texture Control:
Those stretch-and-folds every 30 minutes are so important. It's a gentle way to build strength without overworking the dough, keeping it airy.
-
Finishing Touches:
Using a lame to score the top is my favorite part. It lets the bread expand beautifully in the oven instead of bursting in random spots.
-
Serving Timing:
Now, this is the hard part: you must let it cool for 2 hours. If you cut it too soon, the inside can get a bit gummy, and we want that perfect chew.
-
Place a shallow pan of water in the oven to create extra steam for a crisper crust.
-
If your starter is extra bubbly, you might use a little less than 100 g to keep things balanced.
-
Always use a digital thermometer to check for that 96 °C/205 °F internal temperature.
-
Slide your loaf seam-side down into the hot Dutch oven for the best rise.
Pro Tips
Just take your time and enjoy the process, you've got this!
 Desserts & Baking
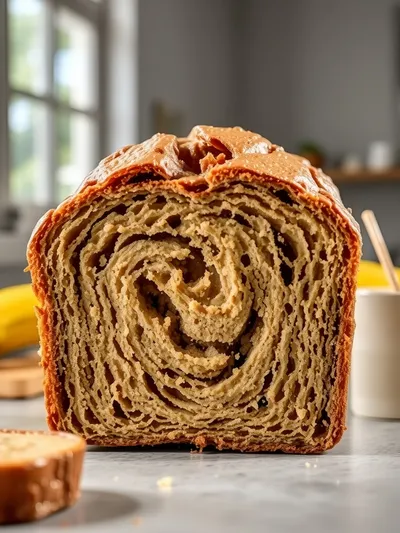
Super Moist Banana Bread – Quick & Easy
A quick, fluffy banana bread that's incredibly moist and perfect for breakfast or a snack.
Better For You Treats
This bread is just so wholesome, really. With only 500 g bread flour, water, starter, and salt, it's full of prebiotic fibers that are much kinder to your tummy than store-bought loaves.
Ways to Make it Your Own
I sometimes swap 250 g of the bread flour for whole-wheat for a nuttier taste. Or, feel free to stir in some fresh rosemary and seeds after adding the 10 g salt for a savory twist.
Serving Suggestions
I love a thick slice toasted with a drizzle of honey, or maybe as a base for bruschetta with fresh tomatoes. It also makes the most wonderful grilled cheese with some Gruyère.
Frequently Asked Questions
→ What if my dough feels too sticky to handle?
Oh, don't worry, sourdough can be a bit temperamental! Just wet your hands with a little water before touching it, and it'll behave much better.
→ Can I bake this without a Dutch oven?
You can, though it's trickier. Use a baking stone and a tray of boiling water at the bottom of the oven to mimic that steam.
→ My bread didn't rise much, what happened?
It might be that your kitchen was a bit chilly. Next time, try proofing the dough in a warm spot or letting it sit a little longer.
Nutrition Facts
per serving
180
Calories
6g
Protein
36g
Carbs
1g
Fat
Taste Profile
A classic tangy sourdough flavor with a balanced salty finish.
Ingredient Substitutions
Don't have an ingredient? Try these alternatives
The bread will have a slightly softer structure and less height.
Line the bowl with a towel and dust heavily with flour to prevent sticking.
Recipe Variations
Try these delicious twists on the original
Whole-Wheat Sourdough Bread
For a nuttier flavor and a denser crumb, replace 250 g of the bread flour with whole-wheat flour. Keep the total flour at 500 g, but you'll likely need to increase the water by 10-15% since whole wheat is thirstier.
Herb & Seed Sourdough Flatbread
After adding the salt, stir in 2 Tbsp chopped fresh rosemary, 1 Tbsp chopped thyme, and 1 Tbsp mixed seeds (sunflower, pumpkin, sesame). Shape this into a flatbread, proof for 30 minutes, and bake at 230°C for 20 minutes.
Common Mistakes to Avoid
Learn from others' mistakes for perfect results
- Slicing the bread while hot, which ruins the interior crumb.
- Under-proofing the dough, resulting in a dense loaf with no bubbles.
- Forgetting to preheat the Dutch oven, leading to a lack of oven spring.
Meal Prep & Storage
Make Ahead Tips
You can proof the shaped loaf in the refrigerator for 5-8 hours to develop more flavor, just remember to let it sit for an hour before baking.
Leftover Ideas
Store slices in a paper bag at room temperature; reheat in a toaster for that fresh-baked crunch.
Perfect Pairings
Serve this with...
Cooking Timeline
Mix flour and water for autolyse
Incorporate starter and salt
Stretch-and-fold series and bulk fermentation
Shape the loaf and final room temperature proof
Preheat oven and bake in two stages
Beginner‑Friendly Homemade Sourdough Bread
Savor the cozy aroma of this beginner-friendly homemade sourdough bread, featuring a deep golden crust and a tender, chewy center. It is a simple, soulful bake that brings the warmth of an artisan bakery right into your own kitchen.
Timing
Prep Time
10 Minutes
Cook Time
45 Minutes
Total Time
245 Minutes
Recipe Details
Ingredients
Main Ingredients
-
01
500 g bread flour (≈4 cups)
-
02
350 g water (≈1 ½ cups + 2 Tbsp water, 70% hydration)
-
03
100 g active sourdough starter (≈½ cup, 20% of flour)
-
04
10 g salt (≈1.5 tsp)
Instructions
Start by grabbing your large mixing bowl and combining 500 g bread flour and 350 g water. Just stir it together until a shaggy dough forms; it'll be a bit wet and look kind of messy, but that's just right. Cover it tightly with plastic wrap and let it have a little nap for 30 minutes—we call this the autolyse phase, and it really helps the flour hydrate.
After that resting period, gently add in 100 g active sourdough starter. I like to use a wet-hand or a spoon to mix it in until the starter is fully incorporated. You'll feel the dough becoming elastic and slightly tacky, which is a lovely sign.
Now, sprinkle 10 g salt evenly over the top of your dough. Just fold and stretch it a few times to get that salt distributed everywhere. Be gentle here; we don't want to over-mix it.
Time for some stretch-and-folds. Pull one side of the dough up and over the rest, then rotate your bowl 90° and do it again. Honestly, just do 4–6 of these folds, spacing them every 30 minutes. It's a quiet way to strengthen the gluten without any heavy kneading.
Cover your bowl back up and let the dough bulk ferment at room temperature (around 24°C/75°F) for about 3 hours. You're looking for it to roughly double in volume, with visible bubbles and a soft, relaxed feel.
Turn that warm dough out onto a lightly floured surface. Shape it into a tight round loaf by folding the edges into the center, rotating 90° each time until the surface is smooth. Place your loaf seam-side up in a floured banneton or a bowl lined with a well-dusted towel.
Cover it with a damp cloth or plastic wrap and let it proof for 1 hour at room temperature, or until it grows by about 30–40%. Well, if your kitchen is feeling a bit chilly, you can pop it in the fridge for 5–8 hours, just remember to let it defrost for an hour before baking.
Preheat your oven to 230°C/446°F with your Dutch oven and lid inside for at least 30 minutes. Once it's nice and hot, carefully slide the loaf in, seam-side down. Put the lid on, return it to the oven, and bake for 20 minutes.
Take the lid off now, and lower the heat to 200°C/392°F. Bake for another 25 minutes until it's a deep golden brown. I always use a thermometer—you're looking for an internal temp of about 96°C/205°F to be sure it's done.
This is the hardest part: transfer the loaf to a wire rack and let it cool completely for at least 2 hours before slicing. It's so tempting to cut in, but waiting lets the interior crumb set perfectly.
Notes & Tips
-
1
The autolyse phase in Step 1 is key for a better texture.
-
2
Using a Dutch oven helps trap steam, which is the secret to that artisan crust.
-
3
Always let the bread cool completely; slicing too early can make the inside gummy.
 Desserts & Baking
One Bowl Banana Bread
Quick, one‑bowl banana bread that’s tender, sweet, and perfect for a cozy treat.
Tools You'll Need
-
Large mixing bowl (1-gal size or larger) for plenty of room to grow
-
Dutch oven with lid to create a professional steam chamber
-
Stainless-steel measuring cups and spoons for accuracy
-
Kitchen towel or plastic wrap for keeping the dough moist
-
Banneton or proofing basket (optional) for a traditional shape
-
Digital thermometer to check the final doneness
-
Rubber scraper for cleaning the bowl
-
Scale (optional) for precise measurements
Must-Know Tips
-
Steam for Crust, place a shallow pan of water in the oven during the first 20 minutes for an even crispier finish.
-
Starter Balance, if your starter is exceptionally bubbly, use slightly less than 100 g to avoid over-autolyzing.
-
Surface Scoring, use a lame or bench scraper to cut shallow slashes on top so the bread expands evenly.
Professional Secrets
-
Stretch-and-folds replace heavy kneading, preserving the airy pockets of the dough.
-
The seam-side down placement in the Dutch oven ensures the loaf rises upward rather than flattening.
-
Internal temperature checking (96°C) removes the guesswork from sourdough baking.
What readers are saying
Community reviews from home cooks like you
I wanted to love this dish, but it didn't quite work for me. I found it a bit sweet for my taste. I think with some tweaks it could be really good.
I wanted to love this dish, but it didn't quite work for me. Next time I'll double the sauce. I think with some tweaks it could be really good.
Can't believe how simple this was. I really liked how the 500 g bread flour (≈4 cups) and 350 g water (≈1 ½ cups + 2 Tbsp water, 70% hydration) came together. Saving this for later.
Pretty good overall. The cups) flavor was nice, but i found it a bit sweet for my taste. I might try it again with some adjustments.
The flavors were spot on. I really liked how the 500 g bread flour (≈4 cups) and 350 g water (≈1 ½ cups + 2 Tbsp water, 70% hydration) came together. Next time I'll double the sauce. Perfect as written.
Perfect for a busy weeknight. I really liked how the 500 g bread flour (≈4 cups) and 350 g water (≈1 ½ cups + 2 Tbsp water, 70% hydration) came together. My kids even asked for seconds.
The flavors were spot on. I really liked how the 500 g bread flour (≈4 cups) and 350 g water (≈1 ½ cups + 2 Tbsp water, 70% hydration) came together. I would reduce the salt a little. My kids even asked for seconds.
Will definitely make this again. I really liked how the 500 g bread flour (≈4 cups) and 350 g water (≈1 ½ cups + 2 Tbsp water, 70% hydration) came together. Great addition to my recipe rotation.
My new favorite way to make Beginner‑Friendly Homemade Sourdough Bread. I really liked how the 500 g bread flour (≈4 cups) and 350 g water (≈1 ½ cups + 2 Tbsp water, 70% hydration) came together. The texture was a touch off, but the flavor saved it. Perfect as written.
Will definitely make this again. I really liked how the 500 g bread flour (≈4 cups) and 350 g water (≈1 ½ cups + 2 Tbsp water, 70% hydration) came together. I found it a bit sweet for my taste. Perfect as written.
So easy and delicious. I really liked how the 500 g bread flour (≈4 cups) and 350 g water (≈1 ½ cups + 2 Tbsp water, 70% hydration) came together. Highly recommend giving it a try.
I was surprised how good this turned out. I really liked how the 500 g bread flour (≈4 cups) and 350 g water (≈1 ½ cups + 2 Tbsp water, 70% hydration) came together. I would reduce the salt a little. Thanks for sharing this one!
Perfect for a busy weeknight. I really liked how the 500 g bread flour (≈4 cups) and 350 g water (≈1 ½ cups + 2 Tbsp water, 70% hydration) came together. Perfect as written.
Can't believe how simple this was. I really liked how the 500 g bread flour (≈4 cups) and 350 g water (≈1 ½ cups + 2 Tbsp water, 70% hydration) came together. My kids even asked for seconds.
Can't believe how simple this was. I really liked how the 500 g bread flour (≈4 cups) and 350 g water (≈1 ½ cups + 2 Tbsp water, 70% hydration) came together. Saving this for later.
Absolutely loved this recipe! I really liked how the 500 g bread flour (≈4 cups) and 350 g water (≈1 ½ cups + 2 Tbsp water, 70% hydration) came together. I found it a bit sweet for my taste. Highly recommend giving it a try.
Decent result for the effort. The cups) flavor was nice, but i would reduce the salt a little. I might try it again with some adjustments.
My new favorite way to make Beginner‑Friendly Homemade Sourdough Bread. I really liked how the 500 g bread flour (≈4 cups) and 350 g water (≈1 ½ cups + 2 Tbsp water, 70% hydration) came together. Perfect as written.
The flavors were spot on. I really liked how the 500 g bread flour (≈4 cups) and 350 g water (≈1 ½ cups + 2 Tbsp water, 70% hydration) came together. Already shared it with a friend.
This was a hit with my family. I really liked how the 500 g bread flour (≈4 cups) and 350 g water (≈1 ½ cups + 2 Tbsp water, 70% hydration) came together. Already shared it with a friend.
Absolutely loved this recipe! I really liked how the 500 g bread flour (≈4 cups) and 350 g water (≈1 ½ cups + 2 Tbsp water, 70% hydration) came together. Saving this for later.
It was okay, with a few tweaks. The cups) flavor was nice, but i found it a bit sweet for my taste. I might try it again with some adjustments.

Recipe by
Amelia HartChef Amelia Hart is a dessert enthusiast who loves creating elegant cakes, cookies, and baked treats. Her baking style combines classic pastry techniq ...
Get Delicious Recipes Weekly
Join 25,000+ home cooks getting our best recipes straight to their inbox.
Free forever • No spam • Unsubscribe anytime