Why You'll Love It
- - No‑bake, quick to assemble, perfect for last‑minute cravings
- - Fun visual that makes guests smile
- - Classic Oreo flavor with a fresh twist
- - Gentle on the palate, no overwhelming sweetness
“These Oreo sushi rolls are a total crowd‑pleaser—so simple, yet they feel special!”
Essential Ingredient Guide
- Oreo cookies: Choose classic chocolate‑cream Oreos; they provide the perfect balance of crunch and sweet filling.
- Cream cheese: Softened cream cheese becomes the binding ‘rice’; use full‑fat for richer texture.
- White chocolate chips: Melting these adds a glossy finish that mimics sushi rice shine.
- Powdered sugar: A dusting adds a subtle snow‑like surface, echoing the look of rice.
- Lemon zest: Just a pinch brightens the overall flavor without overpowering the cookie taste.
- Vanilla extract: A few drops deepen the aromatic profile, making each bite feel cozy.
Complete Cooking Process
-
Ingredient Readiness:
Crush the Oreos into fine crumbs, soften the cream cheese, and melt the white chocolate gently.
-
Flavor Development:
Combine crumbs with cream cheese and lemon zest, allowing the mixture to meld for a few minutes.
-
Texture Control:
Press the crumb mixture firmly onto a sheet of plastic wrap, shaping a smooth log.
-
Finishing Touches:
Slice the log into bite‑size rolls, drizzle with melted white chocolate, and dust with powdered sugar.
-
Serving Timing:
Serve within an hour for optimal texture; the rolls stay tender but don’t wilt.
- Keep the cream cheese at room temperature for easy mixing
- Press the crumb log tightly to avoid crumbly rolls
- Use a shallow dish for the melted chocolate to dip quickly
- Store any leftovers in an airtight container in the fridge
Pro Tips
When you follow these little suggestions, the rolls hold together beautifully and the chocolate glaze stays glossy. I find that letting the rolls rest a few minutes after drizzling lets the flavors settle, making each bite feel just right. So, take a moment, breathe in the cocoa aroma, and enjoy the simple pleasure of a dessert that feels both playful and comforting.
The essence of the dish:
A fun fact or historical angle:
Flavor or sensory focus:
You Must Know
- Use a sturdy plastic wrap to shape the rolls
- Don’t over‑mix the crumbs, or they become soggy
- Work quickly once the chocolate is melted
Frequently Asked Questions
→ Can I use gluten‑free cookies?
Yes, substitute gluten‑free chocolate sandwich cookies for a similar texture; the flavor will stay true.
→ How long do the rolls keep?
Store in the fridge, tightly covered, for up to two days. Bring to room temperature before serving.
→ Can I add nuts?
Finely chopped pistachios or almonds add a lovely crunch; fold them into the crumb mixture.
→ Do I need a food processor?
A zip‑top bag and a rolling pin work fine; just crush until fine.
→ Is this suitable for kids?
Absolutely—no hot steps, and the flavors are familiar and safe.
→ What drinks pair well?
A cold glass of milk or a light rooibos tea complements the chocolate sweetness.
Chef's Tips
Work quickly once the chocolate is melted to keep it glossy.,If the mixture feels dry, add a teaspoon of milk to help bind.,For a decorative touch, sprinkle a pinch of edible gold glitter on the chocolate glaze.
Nutrition Facts
per serving
120
Calories
2g
Protein
15g
Carbs
6g
Fat
Taste Profile
Chocolatey comfort with a hint of citrus
Ingredient Substitutions
Don't have an ingredient? Try these alternatives
Ensure they have a similar cream filling for texture.
Will give a richer flavor; melt carefully.
Recipe Variations
Try these delicious twists on the original
Mint Chocolate
Add a few drops of mint extract to the cream cheese and drizzle with dark chocolate instead of white.
Fruit Fusion
Layer thin slices of strawberry or kiwi between the crumb layers for a fresh pop.
Common Mistakes to Avoid
Learn from others' mistakes for perfect results
- Over‑mixing the crumb mixture causing it to become soggy
- Not chilling the log enough, leading to crumb spill when slicing
- Using too hot chocolate, which can melt the rolls
Meal Prep & Storage
Make Ahead Tips
Prepare the crumb log and chill; drizzle with chocolate just before serving for best texture.
Leftover Ideas
Refrigerate and gently warm in the microwave for 10 seconds before re‑drizzling chocolate.
Perfect Pairings
Serve this with...
Cooking Timeline
Crush cookies and combine with softened cream cheese and flavorings.
Shape crumb mixture into a log, wrap tightly, and chill.
Slice chilled log into rolls and arrange on platter.
Melt chocolate, drizzle over rolls, dust with powdered sugar, and serve.
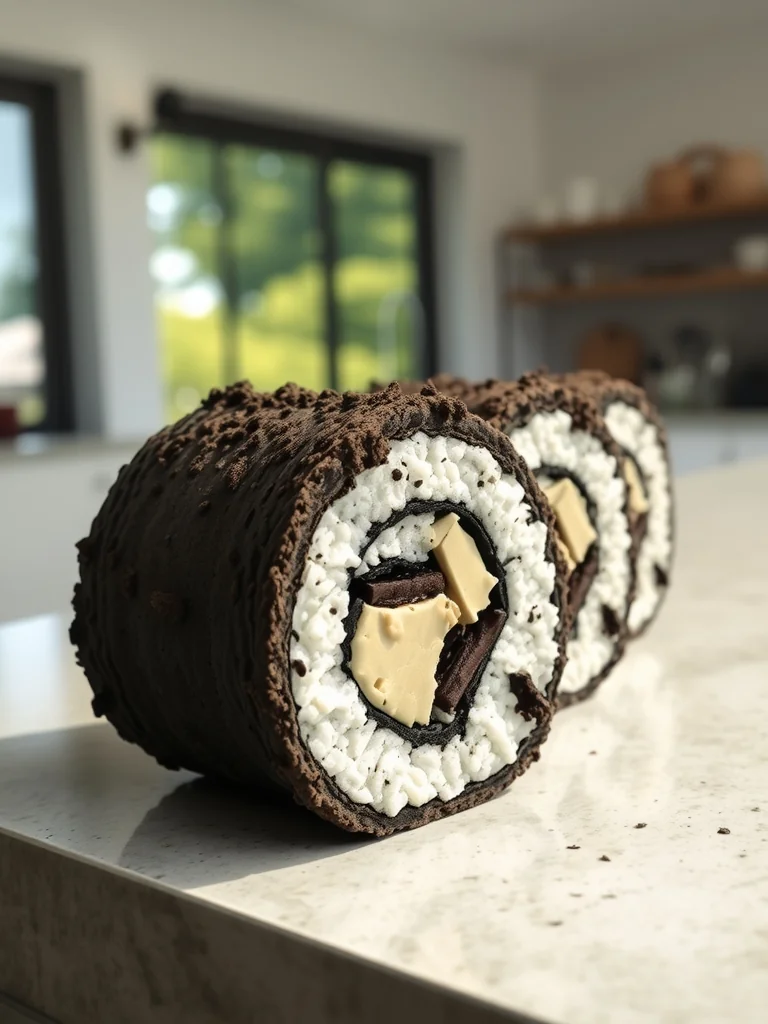
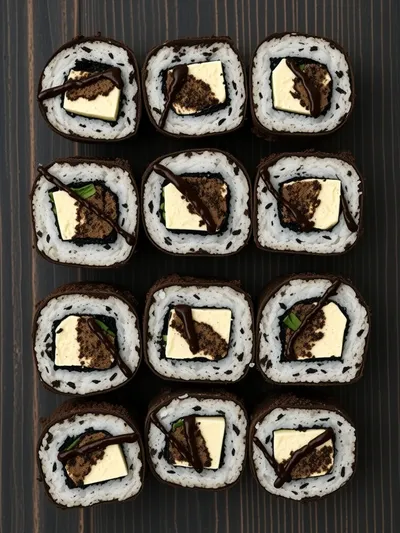
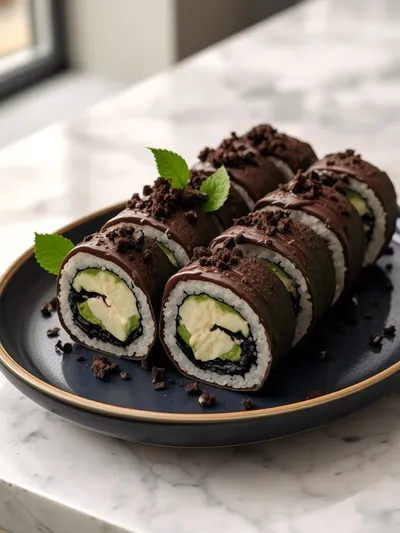
Oreo Sushi Rolls – No‑Bake Dessert
A playful, no‑bake dessert that looks like sushi but delivers the familiar, comforting crunch of Oreo cookies, perfect for a quick sweet bite.
Timing
Prep Time
15 Minutes
Cook Time
0 Minutes
Total Time
15 Minutes
Recipe Details
Ingredients
Main Ingredients
- 01 24 Oreo cookies, crushed
- 02 8 oz cream cheese, softened
- 03 1 tsp lemon zest
- 04 1 tbsp vanilla extract
- 05 2 tbsp powdered sugar
- 06 ½ cup white chocolate chips, melted
Instructions
Place the Oreo cookies in a zip‑top bag and crush them with a rolling pin until fine, then transfer to a mixing bowl.
Add softened cream cheese, lemon zest, vanilla, and powdered sugar to the crumbs; mix until a pliable dough forms.
Lay a sheet of plastic wrap on the counter, scoop the dough onto it, and shape into a tight log about 1‑inch thick.
Using the wrap, roll the log tightly, then unwrap and refrigerate for 5 minutes to firm.
Slice the chilled log into 1‑inch rounds, drizzle each roll with melted white chocolate, and dust lightly with powdered sugar.
Notes & Tips
- 1 Work quickly once the chocolate is melted to keep it glossy.
- 2 If the mixture feels dry, add a teaspoon of milk to help bind.
- 3 For a decorative touch, sprinkle a pinch of edible gold glitter on the chocolate glaze.
Tools You'll Need
-
Zip‑top bag
-
Rolling pin
-
Mixing bowl
-
Plastic wrap
-
Sharp knife
-
Microwave‑safe bowl
Must-Know Tips
- Don’t over‑mix the crumb mixture, it can become soggy
- Press firmly when shaping the log for clean slices
- Let the chocolate set for a minute before serving
Professional Secrets
- Room temperature cream cheese blends smoother
- Fine crumb texture mimics authentic sushi rice
- Melting chocolate slowly prevents scorching

Recipe by
Amelia HartChef Amelia Hart is a dessert enthusiast who loves creating elegant cakes, cookies, and baked treats. Her baking style combines classic pastry techniq ...
Get Delicious Recipes Weekly
Join 25,000+ home cooks getting our best recipes straight to their inbox.
Free forever • No spam • Unsubscribe anytime